Saturday 29 November 2008

Deconstructing Dark Cloud's pants

For years Gib has yearned to have pants like Dark Cloud's from Crouching Tiger, Hidden Dragon. In about a week he needs a costume for an event we are attending, so he's going as some sort of warrior, and it seemed like the perfect opportunity for me to give them a go. I'm not aiming for his pants exactly, but a similar style.


The problem:

I've been trying to take still shots from the DVD and work out how on earth they made those pants look so damn cool. I thought it would be straight forward, but there are surprisingly very few shots of the pants at angles that make it easy for working out how they are made. It's been hard to work out whether there is more than one layer, or if its just folds because the legs are really wide, or if there's a split somewhere. I have thought that maybe they were constructed like hakama...


... or wrap pants ...


... or Thai fisherman pants ...

...and after watching and replaying various sections and replaying over and over again, it's still too hard to know. The best view of the pants in full was in a scene where Dark Cloud was cartwheeling down sand dunes in a fight scene, and the pants billow out in full. I'm pretty sure from that the pants are just one piece, and the things I thought were splits are just folds (but the fabric is quite fine, so it looked like it could be a separate piece).

The conclusion:

I have come to a workable conclusion (as in, I don't care if it's wrong, this is how I'm doing it) that the pants are massively wide fisherman pants made in 4 panels, and the extra layers in the legs are just extra pleats that tuck in at the front.

Solution:

I took Gib down to Ziguzagu in Richmond and we picked up some beautiful hemp fabric that I've dyed black (or tried to. They are dark brown and still ok. My constant disasters when it comes to dying fabric can be left for another post!). I'm going to work with two patterns and nut out a pair of pants from there. They might turn out nothing like Dark Cloud's, but it'll be damn fun trying to make it.

Friday 28 November 2008

Following from a random thought...

A while ago over at Sixteen Bluebirds, Fi said:

"Please tell me I'm not the only one who tries to pronounce the word verification letter-thingy? You know, "meddegxej" and "bxftsp" and stuff like that?"

Yes, I'm definitely in the school of people that tries to pronounce them too! And for some reason I've remembered that little post for all of this time. I remember it whenever I get an amusing verification word. But that post has popped into my head more frequently of late because it seems almost every single word these days seems to be less random and more... pronouncable.

So, for those of you out there who try to pronounce the blogger verification words: do you think they have become way more pronouncable recently?

It's like diabetes, but not

Thursday 27 November 2008

Just a minute in... November

I spotted Jess' Just a Minute post and it reminded me to do mine! I missed last month's but I hope you will forgive me. This month has been a bit up and down: mostly up with a few downs, but I'm going forwards rather than backwards.

Discovering... about 2 hours ago that someone had tried to break into my car, presumably for a joy ride. I think this is one of the few times I can say that it's fortunate that my car's engine and turbo are dead, and the transmission is on its way out. I don't understand some people in this world.

Reading...
The Silver Chair in the Chronicles of Narnia. Yep, still reading it. I like to pretend it’s because I’m savouring each book, but really it’s because am only capable of reading one or two pages of a book before falling asleep at night. PhD reading never ends, but that’s completely fine with me. My “new and exciting journal articles to read” pile is a bit monstrous now, but on the plus side, I’m finding don’t need to pause every sentence to check what the words mean.

Reflecting... on my decision to finally leave my dojo after 15 years and forge my own path in karate. It's nothing to do with karate politics or anything like that, just realising that my ideas have grown into something different to that of my instructor. One of the hardest decisions I’ve ever had to make, and it was even harder telling my sensei I had to go. Honestly, leaving a dojo is worse than breaking up with a boyfriend. But I’m learning that sometimes it’s important to follow what heart tells you.

Learning... that my grandma has myeloma, which is a type of bone marrow cancer that affects plasma cells. I don’t see my grandparents all that often, but I’ve been making sure to get to the hospital and check that the doctors are treating my grandma well. It’s chronic and can be managed over the long term, but still, not the sort of news you want to hear.

Sewing... loads of things for Christmas (aprons, pot holders, wheat bags, other bags of all sorts) as well as some clothes for Gib. I’m feeling really inspired to sew right now, which is handy given how much I’m planning to get through before Christmas.

Enjoying... the sunshine, but also how it’s not revoltingly hot at the same time. Great weather for sitting on the veranda eating lunch or having a cup of tea, gardening and going for nice, long walks.

Eating... all of the delicious stone fruit that is just coming into season! There is nothing I love more than nectarines. Oh, and peaches, and cherries and apricots... mmm... and mangoes...

Photo by atomicshark

Thanks Jen, over at August Street for hosting Just a minute... what have you been up to this month?

Wednesday 26 November 2008

Pickled onions are now pickling!

Ok, so to finish from yesterday...
  • After you have your nicely infused vinegar, strain it through some muslin and set aside.
  • Rinse and wipe down the onions using a clean towel to remove any excess brine. Pack your onions into sterilised jars (although part of me wonders why you bother sterilising the jar when you're about to add loads of vinegar to it, but I still do it anyway). I use the blunt end of a skewer to pack them in nice and tight, but I'm sure there's an easier way of doing it that I'm yet to discover. Remember, if you're using chilies, put them in first.
  • Pour the vinegar over the onions and fill to about 2cm from the top. I like to use a funnel to do this (that might sound obvious but I just tried using a ladel for years and I'd make a horrible mess). Optional: Add a few of the spices for extra decoration and to help the flavour develop, although note that sometimes you'll get a little bit of sediment forming from the spices if you do this.
  • Pop the lids on your jars and seal them. I prefer the water bath method myself, which I do in a very deep pot.
Et voila!


Wait at least two (but I always wait four) weeks before eating.

Tuesday 25 November 2008

Time to get pickling!

Another thing I like to make for Christmas presents (and for myself) is pickled onions. I'm getting them done now because it's at least 2-3 weeks before you can eat them after they are in the jar, although I like to leave them for 4-6 weeks, just to be sure. I get a bit nervous at the thought of eating pickled onions that aren't quite fully pickled. Don't ask me why.

I think the secret ingredient in pickled onions is honey. It gives a lot more depth in flavour to the pickled onions. Oh, and the long, bright red chili. It makes the jar look really pretty and also gives the pickled onions a bit of kick. I've been making pickled onions annually for about 5 years now, and my recipe has adapted over time, but this is the one that I've used for the past 2 years and was the best yet.

Day 1: Brine the onions
  • 1.75 kg pickling onions, peeled, topped & tailed (roughly enough for 5 x 500 ml pasta sauce jars)
  • 150 g salt
  • 1.5 L water
Dissolve the salt in the water: it may need to be heated gently for the salt to fully dissolve. Add onions. Leave in the brine overnight (or two nights, if you run out of time on the first night, like me).


Day 1 or Day 2: Make the spiced vinegar

Make the spiced vinegar. I prefer to make this the same night I cut up my onions, to allow the spices to really infuse through... and also because I am lazy and like to just make it and pop it in the fridge and forget about it. You can make it the following day, just remember to allow the vinegar and spices to infuse for at least 2-3 hours. Use whatever vinegar you like: I use a combination, generally because I don't have enough of just one type lying about the house. I do like to add at least a cup of apple cider vinegar give it a slightly sweeter flavour and because it gives the vinegar a nice golden colour, which contrasts beautifully with the red chili and white onions. For a few years I used the honey from my friend who was a backyard apiarist, but unfortunately he moved interstate, so now I just use whatever rich flavoured honey I have on hand (leatherwood or similar).

  • 1 litre white vinegar
  • 1 cup white wine vinegar
  • 1 cup apple cider vinegar
  • 15 g all spice
  • 15 g coriander seed
  • 10 g black peppercorns
  • 10 g mustard seeds
  • 2 sticks of cinnamon
  • 3-4 whole cloves
  • 2-3 bay leaves
  • 1/2 cup honey (or to taste)

Heat all ingredients to boiling, cover, simmer for 15 mins. Allow to cool and infuse for 2-3 hours at least, or overnight.

Day 2. Packing and pickling

You'll have to wait until tomorrow for the next installment. I'm actually putting the onions and vinegar into the jars later tonight because I realised I wont have enough time to finish them tomorrow, and leaving it til Thursday to jar them up is a bit much (I love pickling because it is flexible, but I think I'd be pushing there boundaries there!). When I'm done I'll be too tired to post, but it builds the excitement anyway... in case there are any of you out there who also get excited by pickled onions!

People who know how to make freaking awesome pie dough

I don't make or even eat pies very often (they're a little rich for me and I need to keep a bottle of Mylanta handy afterwards!), but when do, I want the dough to be freaking awesome. I am usually inspired to bake a pie when there is a large gathering and I need to bring a plate, so basically when I'm out to impress. But there's a definitely a knack and the books make it sound so easy. Like sponge cake recipes. And I've made plenty of crap pies while trying to impress!

I've found two great tutorials for making pie dough though: one that uses a mixer, and the other that swears by hand mixing.

  • Smitten Kitchen, one of my all time favourite food bloggers, recently posted a follow up post on how to make really flakey pie dough. The original, easy to follow, fool proof pie crust tutorial can be found here. I have to say, I'm completely with her on the no-shortening thing (I hate the taste and texture). The combined tips and explanations from both of these bloggers has helped my confidence immensely when it comes to pie making.

I know there are probably a gazillion more posts out there on how to get the perfect pastry, but these two have given me the most help and inspiration, and have yielded the best results, so I haven't bothered to look further. Having said that, if you've got any tips to share I'd love to hear them! I love having little collections of ideas on a topic!


Tomato and onion tart by Beyond Salmon

Friday 21 November 2008

A gardening confession...

This is going to sound incredibly lame, but I hate getting my hands dirty. I hate getting dirt under my nails. I hate my hands feeling dry and dusty (my skin is actually prickling at the thought). Worse, I also hate the feeling of those cheap, nasty $2 leather gardening gloves too, because they also leave my hands feeling dry and dusty. It's gotta be the super dooper soft cloth inndards with the super tough plastic coating ones for me - ultimate for ripping out that freaking periwinkle.


A person who loves gardening but hates dirt. And nasty gardening gloves. Crazy, hey?

Wednesday 19 November 2008

Curse of the periwinkle

This is a bit of a work in progress in the garden at the moment. We're trying to clear the backyard of blue periwinkle. Blue periwinkle, like the innocent looking and very popular arum lily, is a noxious weed in these parts and notorious for seriously choking up the local waterways. It just sort of arrived in the backyard and proceeded to take over. Probably about 1/4 of the whole garden is covered with the stuff - and it's not a big backyard.

From the top

From the bottom

I really should have taken a before photo, but I got so into ripping it out that it totally slipped my mind, so just imagine that all of that dirt area was covered with blue periwinkle. It's a pain to clear because it grows in tight nodes and you have to rip out the roots or the fragments just grow back.
"Spreads locally mainly by stems that root at nodes. Seed is apparently rarely produced in Australia. Long distance dispersal occurs via stem fragments and crowns dispersed as garden waste or by water."
But we're slowly getting there. It's all down the side of the house as well. Our very ambitious Grand Ultimate Plan is for the plants in our garden to be indigenous, or at least native. It's amazing how quickly extra birds and pretty butterflies come through the backyard just by adding a few more local plants. There are a few remnant patches nearby and there are local parks and waterways, maintained by local environmental groups, that we're getting some inspiration from.

We have a few ferns leading down to the backyard (the property is on a hill) and we thought it would be totally awesome to have bracken (Pteridium esculentum) growing in the more dry parts of the backyard, to keep the continuity in the backyard and because it's indigenous. Although I have no idea where to get bracken - you can't just buy it because it grows from spores and doesn't take so well to transplantation. And strangely enough, many people think it's a weed (mostly stemming from farmers' dislike of it because it makes their cattle ill) so there are many websites on the struggles on how to remove it (once the spores are settled, it's hard to remove), but not how to get actually some in your backyard.

Failing on the bracken idea, we might just trawl the list of indigenous plants supplied at Kuranga and see what we can buy.

Monday 17 November 2008

This is... my favourite thing from nature

Even though I put forward the topic this week, I actually had no idea what my favourite thing from nature was! However, after much thought, I realised that my interest was very broad and could only be reduced to this: Australian bushland.

Courtesy of wikipedia

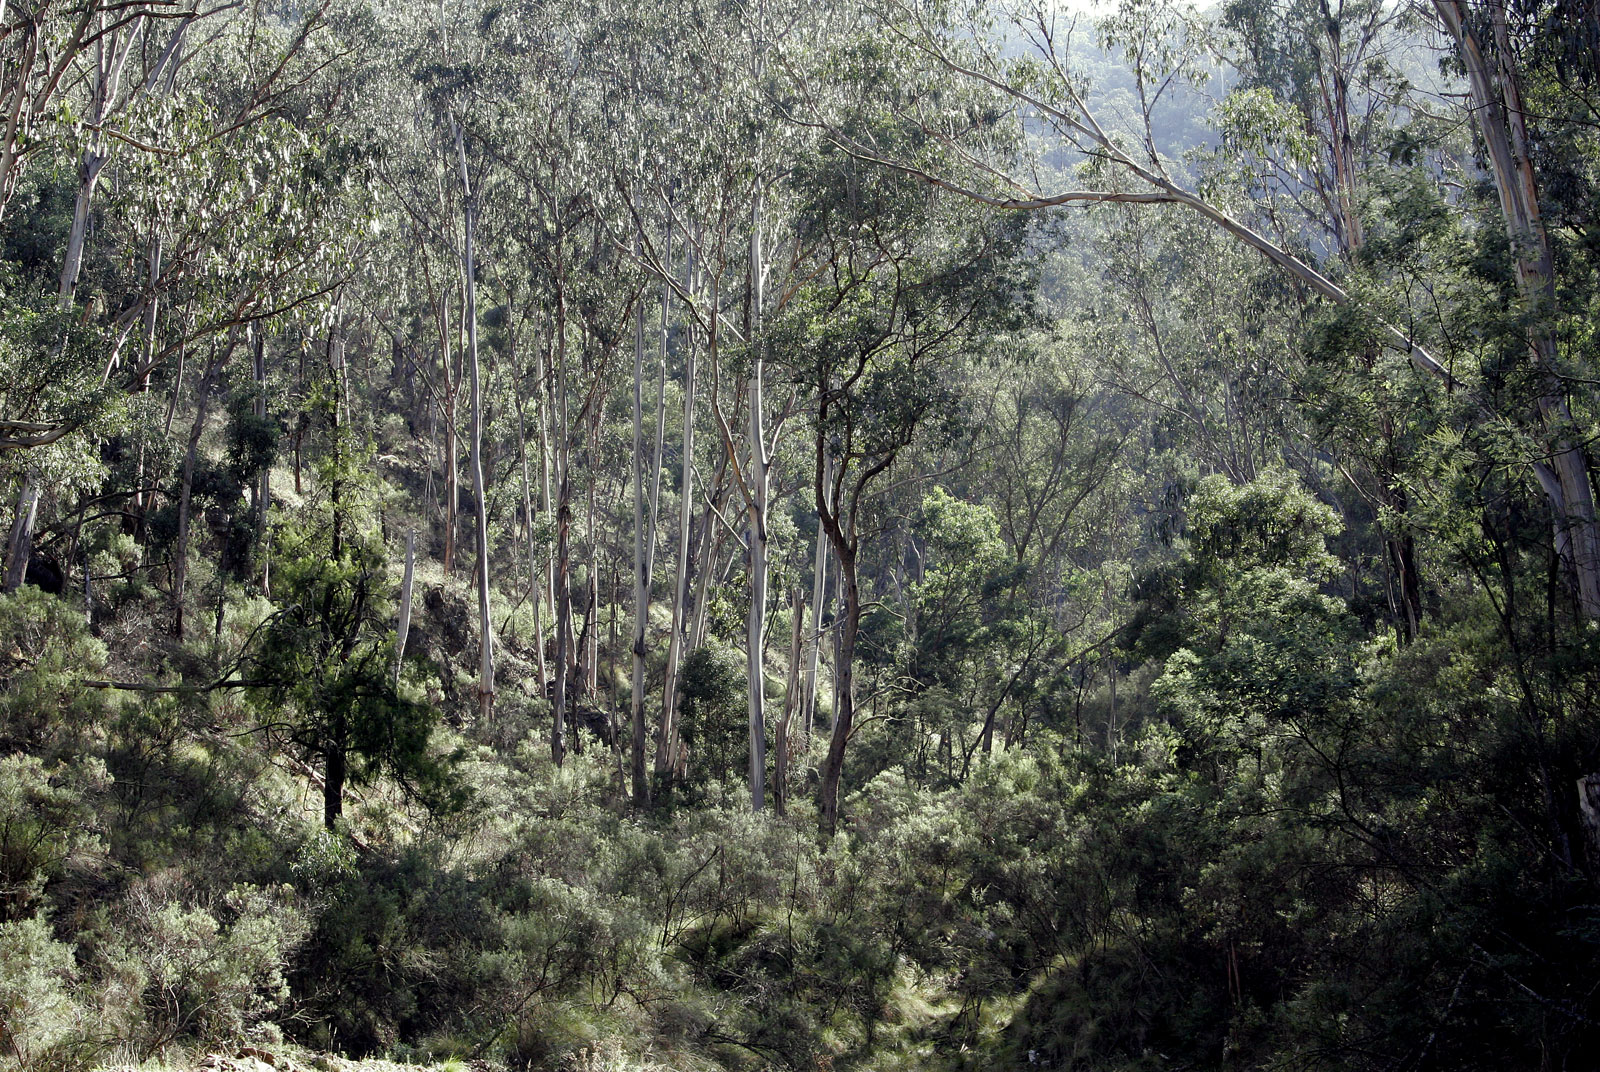
There are the muted greens, the dryness of it all, the variation in shapes in the foliage. Then there are the coastal bushes too, with their fat, furry leaves. When I was young, I never ever tired of long family car trips with miles of dried grasses and eucalpyts. As I got older and learned a little bit about native plant physiology (it always comes down to physiology and "how stuff works" for me), the bushland that I had loved as a kid suddenly had a new level of awesomeness. Like learning how the odd features of coastal plants, like their furriness, help them to survive. Or why eucalypts suddenly sprout leaves from their trunk after fire - and look pretty silly - was because of a fascinating process called coppicing, where buds under the surface of the trunk suddenly sprout to compensate for the leaves lost in fire. Actually, all of the eucalpytus' adaptations are pretty cool. It's combined beauty and function makes it a never ending source of fascination for me.

Thanks to Three Buttons for letting me choose this week's theme, and for hosting This is!

Gardening bag - finished!

Well it took me about half an hour to finish off the bag after my frustrations from the other night. I have to say, I was rather pleased with the outcome and may even make one for myself. I hope my cousin who I'm giving it to for Christmas likes it. It has lots of spacious pockets for spades, forks, gloves and fresh flower cuttings. But I reckon it'd make a great bag just for taking out and about too, like for a picnic.


Very straight-forward to sew. Approximate time to make: 3-4 hours.

Sunday 16 November 2008

Gib and I are celebrating our 3 year anniversary today! Hooray! Um, it means I'll be a day late in doing my This is... post (my first late one!) and in showing you all the photos of the gardening bag. But I can assure you they will totally be worth the wait (maybe)!!


I could gush for hours, but I wont. I think this photo pretty much sums us up.

Friday 14 November 2008

A 15 minute powernap could save your sewing

I should know better than to sew late at night, and especially after a glass of wine. But yet, I still decided to roll with it, eager to get a Christmas present out of the way. I am making a gardening bag for my cousin, from Lotta's Simple Sewing book. At one point, right before I was going to stitch the handles in, I was feeling a bit smug, thinking "Oh wow, I can't believe I have almost finished this bag without having made a mistake yet!". And then I tried to work out why the lining was fitting awkwardly. And then I realised that I had sewed the base in sideways. I have no idea how that happened. Not a biggie, but still frustrating. That's the point where I threw it down on the table and walked away. I probably would have continued had I not been so smug the whole evening about how well I was doing, getting everything right.


If you drink, then sew, you're a bloody idiot

Take a break, fatigue kills your sewing skills

Overall though, like all of Lotta's patterns, even though this is one of her more complicated patterns, it is still very straight forward. There are a few bits where you have to make some pleats, and really that's the most complex part. And again, her time estimates were spot on (or would have been had I not sewn the base in sideways).

Wednesday 12 November 2008

This week's 'This is' theme!

Ooh I was stoked to be asked to name this week's This is theme. Over the past week or so I've been hanging out in the garden, heading down to the beach to enjoy the warm weather, listening to fruit bats arguing in the trees. There are the big things, like clouds and oceans, and little things like bugs and flowers, and I find thinking about them as a whole is very humbling. So with that in mind, this week's theme is:

This is... my favourite thing from nature


Tuesday 11 November 2008

Week of Happy

I'm a little late jumping in on this, but Meet Me at Mikes is having a Week of Happy! but I have at least been thinking happy thoughts this week and reflecting on what makes me happy. Here's what's been on my happy mind this past week:

Education: My office buddy is from South America and often tells me stories of her time at university in the '70s in police run states, overcrowded lecture halls where people would have to camp out overnight in the theatres to have a place and libraries where you weren’t able to browse books, but had to give a little card to the librarian who then retrieved the book for you. Things that we take for granted. The ability to read freely, understand and question the world around me makes me immensely happy.


Support: I've been hanging out with tons of friends, old and newer friends. Having a wonderful support network of good friends and family makes me happy. My boy and his antics have had me in hysterics (he knows how to ride a fine line between amusing me and infuriating me). We’ve been best friends for years and there’s nothing like hanging out with my best friend!

Good health: I think, right now, is the healthiest and fittest I’ve been and I feel like Little Miss Unstoppable. Perhaps it’s the sunny weather (see below), but it feels good to have good health. I found out recently that my grandmother does not have such good health right now, however as this is Week of Happy I am making the most of my own and my immediate family’s good health!

Sunny weather: the weather makes me unproductive at work, but it makes me happy nonetheless. I spent yesterday afternoon in the garden in the sunshine and the smells of the eucalypts were so good.


Ruud Welton's photo of Melbourne's sunny, blue skies

Dr Isis’ blog giveaways: Dr Isis the Domestic and Laboratory Goddess, who appreciates tight science, nice people and hot shoes, is giving away a pair of (never worn) shoes, in celebration of her move to Scienceblogs. That makes me very happy.


You can be a domestic and laboratory goddess too!


Carnivorous plant developments

The cool thing about having a blog for me is that it's kind of like a lab book. I can detail my methods, make observations and see how things change over time.

Back in May I explained how I took my rather sick scorpioides to a bunch of experts who told me that my poor plant wasn't getting enough light and was growing sparsely. This photo was taken before it got so sick that it lost all of its sticky, bug catching bits. Back then it was sitting in a kitchen window sill in an east facing position. About two months ago we moved it to a warmer, north facing position and despite the fact that its lean is now far worse than before and needs re-potting to correct it (so its new roots are in the ground, not hanging out the side of a pot), it's totally thriving. Look at all of those sticky leaves! And that's a flower sticking out there on the right too.


Scorpioides - May 08


Scorpioides - Nov 08

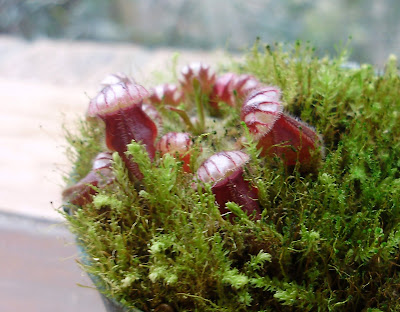
Then there's the Albany pitcher plant (Cephalotus follicularis) that we picked up in July. Back then it was absolutely tiny, the little pitchers were about 1cm, if that. Now look at it! The big pitchers are about 3cm long now.


Albany pitcher plant - July 08


Albany pitcher plant - November 08

We have a few tubs of Sarracenias (no idea what exact species) that are flowering too. I think the flowers are pretty crazy - peculiar bright green stars, with a weird shaped bit poking out from the middle.


In other carnivorous plant news, a while ago Gina was kind enough to link me this: A gorgeous carnivorous plant calendar by A Print a Day available for download in pdf. I think her work is absolutely gorgeous. She also did some other carnivorous plant prints too in such great colours.


Monday 10 November 2008

My herb garden

So I've got on board with the Veg About being hosted by Bellgirl! I think this is a terrific idea (mostly because I had a few gardening posts I hadn't bothered posting yet, and this made me get my act together!). The spring whether has made gardening so exciting!

Here are some onions that started sprouting in the bottom of the cupboard that we decided to plant. It's ok, we didn't have that many onions sprouting in our cupboard, but we have been stockpiling a few sprouting ones on our back veranda for planting for a month or so now. Actually, a couple of these onions were from onions that sprouted in our cupboard last year which we planted. After a few months those onions grew into four new onions, and then we forgot to eat them after they dried out. They've been sprouting for a while, so we decided to plant them again. We have also tried growing sprouting garlic before, but the garlic always gets fungal problems and I haven't bothered to work out how to prevent that yet.


Yes, the tub is a little overcrowded. It'll do for now!


We've potted up a few new herbs and things in the garden recently, partly in preparation for Christmas presents and partly for ourselves.


A slightly overexposed photo of the oregano, sick parsley and thriving thyme. The oregano and thyme are growing fantastically in the spring sunshine.


Mint - this thing growing madly. I'm glad it is in a pot. Unlike the native mint...


This is our native mint. It has taken over the front yard. It's rather overpowering to use in cooking, and tastes more spearminty than pepperminty. It makes an excellent tea though. I think our native mint bush is a bit excessive if we're only using it in tea every now and again.


The story of the mint...

You can see one the left of the photo there is a little clump of native grass. Gib tells me that before the mint, the front yard was mostly native grasses (this was a few years before we were going out). Apparently the grass got a bit long. Gib and his big brother, who both have strong interests in Australian native plants and ecosystems, of course knew that native grasses regenerate well after bushfire. So they thought that it would be a great idea to clip back the native grass while at the same time encouraging future regeneration by... simulating a small bushfire in the front yard. Apparently it was all going quite well, smouldering away while they stood by with a few hoses, until they noticed that the fire was going in a suspiciously straight line across the middle of the garden. It was a plastic underground water pipe system that they had going through the front yard. At which point Gib's dad came home and did his nut, the simulated bushfire was extinguished and native mint planted instead.

Very easy (somewhat healthy) berry yoghurt dessert

I don't have a huge sweet tooth and would much prefer and entree to dessert. Iam not a huge fan of chocolate desserts (*gasp*) and think that they are overrated. I think that might be in part because I spent two years doing kid's parties at an entertainment complex and the vast majority of parties would have a chocolate mud cake. As a party host, you'd always get offered a piece and while that sounds exciting, after a while it loses its appeal. I much prefer fruit based desserts any day.

Last night we were heading to a friend's place for dinner and I was asked to make dessert. It's difficult finding a recipe that's moderately healthy and quick to make, so I made my own. This recipe did turn out to achieve its goal in moderate healthiness and was ridiculously quick to make. It was also given the double thumbs up by our friends, and was promptly gobbled up.


Beth's most fantastic berry yoghurt trifle

Serves 6
  • 10-12 sponge fingers (I used the Unibic brand), cut in half
  • 500 g vanilla yoghurt (I used Jalna's low fat variety as I prefer the more "natural yoghurt" flavour)
  • 500 g frozen mixed berries (or whatever berries you like)
  • 1/3 cup warm water
  1. Mix the berries and warm water together. If the berries you have chosen taste a bit tart (i.e. raspberries) then you may want to dissolve in 1-2 tbsp sugar.
  2. Make a layer of halved sponge fingers on the bottom of your dish. Pour half the yoghurt on top. Pour half the berrie mixture on top.
  3. Add another layer of spong fingers and repeat.
  4. Leave in the fridge for at least 30 mins, although the longer the better so the sponge fingers can soften and absorb all of the juices. I made mine in the afternoon and by dinner time it was perfect.
You could also consider soaking the sponge fingers in something a little alcoholic for some extra kick.


Sunday 9 November 2008

This is... my favourite quote

I picked this quote up a while ago while reading a translation of Miyamoto Musashi's Book of Five Rings. It was mentioned in the introduction and it has stuck with me ever since:

"Empty your cup"

There's a little zen story that goes with it too:
A professor went to visit a famous Zen master, Nan-in, to learn about Zen. As Nan-in quietly served tea, the professor talked about Zen. The master filled the visitor's cup to the brim and then let it keep pouring until it was spilling all over the floor. The professor watched the overflowing cup and cried "What are you doing? It's overfull! No more will go in!". "You are like this cup," the Nan-in replied, "How can I show you Zen unless you first empty your cup."

There are many lessons to be learned from this short story, and I try to keep it in my mind all the time. Be it with my PhD or karate, when I meet new people or cooking or gardening. This quote really struck a chord with me because so often I get tunnel visioned or stuck and so caught up in my own ideas and preconceptions that I can never see another side and I've found that reminding myself to "empty my cup" is incredibly useful for overcoming these things.


Photo by ~Lε@H

Thanks to Strawberry Kisses for this week's topic, and Three buttons for hosting this is...!

First attempt at clothes for small children - success!

I have come to realise how rewarding making kids clothes is. They're so quick to make and you can do lots of cute embellishments. I previously mentioned that I had bought a pattern - Butterick 5713 - and then I proceeded to make the pants and overalls. I rarely sew from a pattern and often don't take the time to read through the instructions carefully when I do. I think this means that it takes me about twice as long to make something as it should, but I'm quite stubborn and tend to think I can predict what the instructions would say (thankfully my attitude while I'm at work in a laboratory isn't the same!).

Actually, the hardest part of the whole project was working out what size to make. What size is a typical 9 month old? I know when I've bought patterns for myself, I pick the right size and then the end result turns out to be 5 sizes too big - was this pattern going to be the same? I decided to go with the large size, rather than the XL size, and it turned out to be spot on for the little boy I was making it for.

The pants:
From not reading the instructions fully, it wasn't until later that I realised that these pants are supposed to be fully lined. We are coming into summer here and so I did away with the full lining, but I liked how the turned up cuffs had a contrasting colour. I added 10cm strip of cute, blue camo fabric to the bottom part of the inside of the leg, so when it was turned up you could see it. Taking the approach of not lining the whole thing also meant I had to alter the casing for the waist elastic, so I added a strip of blue camo fabric around the waist as well.


The overalls:
Went well for the most part as I actually read the instructions. The bit that stumped me was when it started talking about self facings. As I'm a hack sewer I had never come across the term "self facing" before. I couldn't understand what the diagram was telling me to do either. So after fussing about, googling "self facings" and things (I'm glad I'm not the only one who doesn't know!), I finally worked it out. And the instructions and diagram immediately made sense. It felt good to learn something new.


Gave the pants and overalls, and also the bibs I'd made a while ago, to my friend who I caught up with last night. They were immediately put to good use. The bibs are so quick and easy to make, I must make more! The hardest part is thinking what fabric and design to use...


Friday 7 November 2008

Taste Sensation: The Durian Smoothie

Tonight we had a family dinner at China Bar, which was of course the perfect opportunity for a Taste Sensation! At China Bar, the best place to look for a Taste Sensation is the drinks menu. Gib went with the durian smoothie - a bold move.


<span class=


Courtesy of mt_rye. I love the description: "If you don't know what Durian is, you owe it to yourself to look it up on wikipedia. Yes, it made one fellow diner almost ill just from the smell."


If we go to wikipedia, here's the description of the flavour of a durian:

"The edible flesh emits a distinctive odour, strong and penetrating even when the husk is intact. Regarded by some as fragrant, others as overpowering and offensive, the smell evokes reactions from deep appreciation to intense disgust. The odour has led to the fruit's banishment from certain hotels and public transportation in Southeast Asia."

Further on in the article it quotes novelist Anthony Burgess as describing "like eating sweet raspberry blancmange in the lavatory", which is more in line with my opinion of it. The flavour descriptions amongst our family ranged somewhere between dry, mango or off lychee to urinal cakes. It's like a smooth, custardy, pungent fruit, but with an almost savoury twist to it as well. The initial taste was the worst - the smell/flavour is really hits you and is very overwhelming - then the flavour improves to almost pleasant, but quickly deteriorates into vile again.

I can tell you as I'm writing this and burping occasionally (oh, the burps are the worst. I'm actually afraid to burp right now) that I can assure you I will never again consume durian smoothie. Even a quick search on flickr will show you that I'm not the only one. My favourite is the one titled Never. Get. The. Durian. Smoothie. And then there's this poor guy. Regrettably, I was in a rush as I was leaving this evening and didn't have my camera or even my phone (it was charging) to capture the moment.

However we did manage finish the durian smoothie. I think this is a decision we are now regretting.

Recipe Box Swap: Broccoli and peanut salad

This month's recipe swap over at I have to say... is unthemed, so I've decided to go with Gib's mum's friend in Canada's recipe for Broccoli and Peanut salad. When I first read the ingredients I wasn't sure whether I'd like it, but it's absolutely delicious. It's been a favourite in our household of late. Ok, so it's not the best recipe ever if you're trying to watch your weight, despite all of that wonderfully healthy broccoli, but it's not something I'm eating every day (even though I wish I could!). It has bacon in it, but I can assure you that it tastes terrific without it. Broccoli is one of my all time favourite vegetables, but until recently I'd only ever eat it cooked. I remember a work colleague telling me she loved it raw and me telling her she was mad. But then about a year ago I discovered how good it tasted with dips and things or even on its own. Yum!


Broccoli and Peanut salad

1 head of raw broccoli
1 cup dry roasted peanuts
1 cup raisins or sultanas
1 small red onion, chopped
4-6 slices bacon, diced and fried
1 cup mayonnaise
3 tbsp lemon juice (or you can use apple cider or white vinegar)
1-3 tbsp sugar (the original recipe calls for 3 tbsp! But I have found that it's ok without as the sultanas are sufficiently sweet enough)

Trim off large leaves of broccoli and remove the end of the stalk. Dice the stalk into 1cm pieces. Cut remaining broccoli into small flowerets. Wash then soak for 30 mins, then drain.
Combine the broccoli, peanuts, sultanas, onion and bacon in a bowl.
Mix together the the mayonnaise, lemon juice and sugar. Mix the dressing through the broccoli and peanut mixture until well coated.

Hold me back!

Apologies for the lack of posts this week. I have indeed been busy sewing and baking and whatnot, but I have been so busy doing them that I have had little computer time to upload and sort photos. You can look forward to seeing what I've made this week over the weekend! (Oh yes, and I did win a little money on the Melbourne Cup! Hooray!)

In the mean time, Tacolina linked a website that has me very excited. I nearly choked on my cup of tea when I saw just how much amazingly overly cute stuff there was for me to buy! I have to hide my credit card. Thankfully I lost my credit card recently and had to get a new number and I haven't memorised it yet.
I need a new calendar for next year. I have thoroughly enjoyed my Eric Carle calendar this year and wanted something in a similar style. I may have to make a purchase... too cute.


Then there are the dish cloths...


And don't even get me started on the fabric or stationary... oh my!


Sunday 2 November 2008

This is... a favourite recipe I'd like to share

This is a new favourite recipe. Quick, easy and convenient to make, super tasty, and convenient to take to work for lunch (I get so bored by sandwiches). I was inspired by a recipe featured on taste.com.au, which is a finalist in a reader recipe competition in Good Taste magazine. The original recipe says to bake the avocado and sour cream, however I can't stand the bitterness of baked avocado, so I chose to have mine fresh at the end. Serves 6.


Vegetarian Mexican lasagne
  • 2 tsp olive oil
  • 2 brown onions, diced
  • 2 garlic cloves, crushed
  • 1/2 tsp chili powder
  • 1 tsp cumin (I might have added some more cumin just because I love it so much!)
  • 1/4 pinch allspice
  • 1 tsp dried oregano
  • 750 g tin red kidney beans, drained
  • 400g can chopped tomatoes
  • 4 pieces corn mountain bread
  • 2 avocados, mashed
  • 235g (1 cup) sour cream
  • 1-2 cups coarsely grated cheddar, depending on how cheesy you are feeling (of course you can substitute low fat dairy options if you choose)
  1. Preheat the oven to 180°C
  2. In a large, heavy based fry pan, heat the oil and add garlic. Fry for 30 seconds before adding the onion. Cook, stirring regularly, until the onion is soft.
  3. Add the spices, cook for 30 seconds until fragrant. Add beans and tomato, cook for 4-5 mins until beans are heated through.
  4. In a large ovenproof dish, layer with two of the corn bread pieces. Spoon half of the bean mixture on top. Sprinkle with half of the cheese. Layer with another two pieces of corn bread, then bean mix and cheese.
  5. Place in the oven and bake for 30 mins until the cheese is golden and bubbly.
  6. Serve topped with mashed avocado and sour cream.

The original non-vegetarian mexican lasagne

Thank you three buttons for this week's theme (and for hosting This is...) because you all know just how much I love sharing my new favourite recipes!